
25 Lip Tattoos That Actually Work in Real Life (And How to Choose Yours)
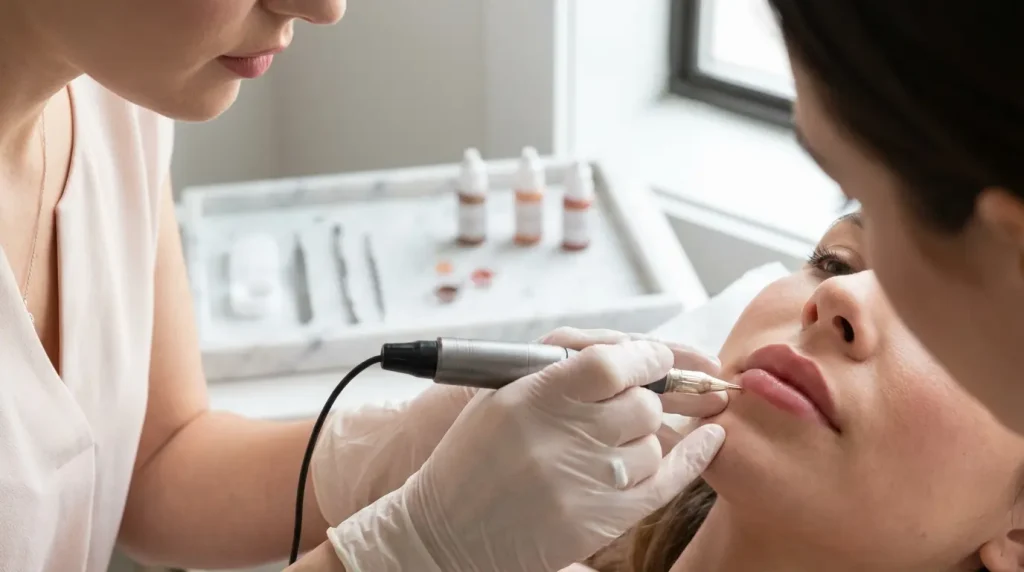
Table of Contents
-
Why Most People Misunderstand Lip Tattoos Before Getting One
-
The Subtle Ones (Because Not Everyone Wants Drama)
-
Nude Lip Blush for Everyday Wear
-
Soft Pink Definition Without the Drama
-
Peachy Coral That Warms Up Your Complexion
-
Natural Mauve for Cooler Undertones
-
Barely-There Berry Stain
-
Coffee Brown Contour Lines
-
Honey Beige Full Coverage
-
-
When You’re Ready to Make a Statement
-
Classic Red That Never Fades (Except It Does)
-
Deep Burgundy for Maximum Impact
-
Hot Pink That Commands Attention
-
Plum Wine with Purple Undertones
-
Brick Red with Orange Notes
-
True Cherry Bomb
-
Fuchsia Fade from Center Out
-
Orange-Red That’s Warmer Than Classic
-
-
The Weird and Wonderful
-
Ombré Gradient from Dark to Light
-
Two-Tone Split Design
-
Glitter-Effect Shimmer Overlay
-
Metallic Rose Gold Finish
-
Frosted Lavender Tips
-
Blackberry Stain with Blue Base
-
-
Fixing What’s Actually Wrong
-
Scar Coverage Blending
-
Asymmetry Correction Through Shading
-
Vitiligo Camouflage Matching
-
Age Spot Neutralization
-
Look, I’ve broken this down into categories that actually make sense, but honestly? Some of these could fit in multiple spots. The line between “bold” and “creative” gets blurry. Whatever.
TL;DR
The short version: Lip tattoos fade in 2-5 years (they’re not actually permanent, despite what Instagram says). You’ll need multiple sessions because lips heal unpredictably. The color you pick needs to work with what you’ve already got, not just your favorite lipstick shade.
Healing sucks for 4-6 weeks with your color changing constantly. Expect to pay $400-$1,500 per session depending on how complicated the work is. Touch-ups are mandatory every 12-18 months if you want to keep things looking fresh.
Medical conditions and medications can mess with results drastically. The real value is in corrective work and subtle enhancement, not trying to replicate bold color permanently. According to Kashia Buks, founder of Dermaluxe Spa, most clients enjoy results that last 2 to 3 years or longer with proper care, though how long yours lasts depends on your skin type, lifestyle, and which pigment you choose.
Why Most People Misunderstand Lip Tattoos Before Getting One
Can we talk about the massive lie everyone believes about lip tattoos? They’re not permanent lipstick. They’re not going to give you MAC Russian Red forever. I don’t care what your friend’s cousin’s aesthetician promised you, that’s not how this works. And if you walk into a consultation expecting that, you’re gonna be pissed in about six months.
What actually happens is way more complicated than people realize. Your lips aren’t like the skin on your arm. They’re constantly moving, constantly exposed to food, drinks, sun, and saliva. All of these things affect how pigment settles and how long it stays visible. When you get your lips tattooed, you’re signing up for a maintenance relationship, not a one-and-done miracle.
Here’s the thing nobody tells you about lip tattoos: your body’s unique chemistry plays a massive role in color retention. Two people can get the exact same pigment from the same artist, and their results will look completely different six months later. I’ve watched two sisters get matching “nude blush” from the same artist on the same day. Six months later, one looked like she’d been lightly kissed by a rose petal. The other looked like she’d been making out with a Creamsicle. Same pigment. Same artist. Wildly different results.
The term “permanent lipstick” is misleading and frankly irresponsible. We’re dealing with semi-permanent pigment implantation that fades over 2-5 years. Even celebrities are embracing this in unexpected ways. Kim Kardashian, who famously stated “you don’t put a bumper sticker on a Bentley” when discussing her aversion to tattoos, revealed on The Tonight Show with Jimmy Fallon that she got a small infinity symbol tattooed inside her bottom lip after hosting Saturday Night Live in 2021. The hidden placement shows how lip tattoos have evolved beyond bold color statements to include subtle, personal expressions that remain completely invisible in daily life.
Lip tattoos serve multiple purposes beyond looking pretty. We’re talking about corrective work for scarring, medical camouflage for conditions like vitiligo, and genuine time-saving for people who apply lip products daily. Success depends on managing expectations from day one.
|
Expectation vs. Reality |
What People Think |
What Actually Happens |
|---|---|---|
|
Longevity |
Permanent like body tattoos |
Fades over 2-5 years, requires touch-ups every 12-18 months |
|
Color Accuracy |
Exact lipstick shade replica |
Pigment changes as it heals; final color appears 6-8 weeks post-procedure |
|
Maintenance |
One-and-done solution |
Requires sun protection, aftercare, and regular refresher sessions |
|
Pain Level |
Extremely painful |
Moderate discomfort; most clients rate it 4-6 out of 10 with numbing |
|
Healing Process |
Quick like makeup application |
4-6 weeks with peeling, color shifts, and lifestyle restrictions |

The healing process is a mindfuck, honestly. Week one: “Oh god, this is way too dark, what have I done?” Week two: peeling and patching like you have lip leprosy. Week three: “Wait, where did all the color go? Did it… fall off?” Week six: “Oh. Okay. That’s actually what I wanted.”
Nobody prepares you for this emotional rollercoaster.
Understanding what a lip tattoo can and can’t do prevents the disappointment we see way too often in this industry. Can it give you defined, enhanced lips that look polished without makeup? Absolutely. Can it replicate the exact intensity of your favorite bold lipstick tattoo and maintain that vibrancy indefinitely? Not even close.
The Subtle Ones (Because Not Everyone Wants Drama)
Okay, so you don’t want to look like you got your lips tattooed. You just want to look… better. More awake. Like you’re someone who has their shit together even when you definitely don’t.
These are for you.
The beauty of subtle lip tattoos is how they work with your existing lip pigmentation rather than fighting against it. They’re ideal for professional environments where bold makeup might feel inappropriate. More importantly, they age gracefully. While bold reds and hot pinks fade into unrecognizable shades, subtle enhancements simply soften over time, maintaining a natural appearance even as they fade.
Each design in this category focuses on creating definition, correcting minor asymmetries, and adding dimension while maintaining that no-makeup-makeup aesthetic that works across different skin tones and undertones.
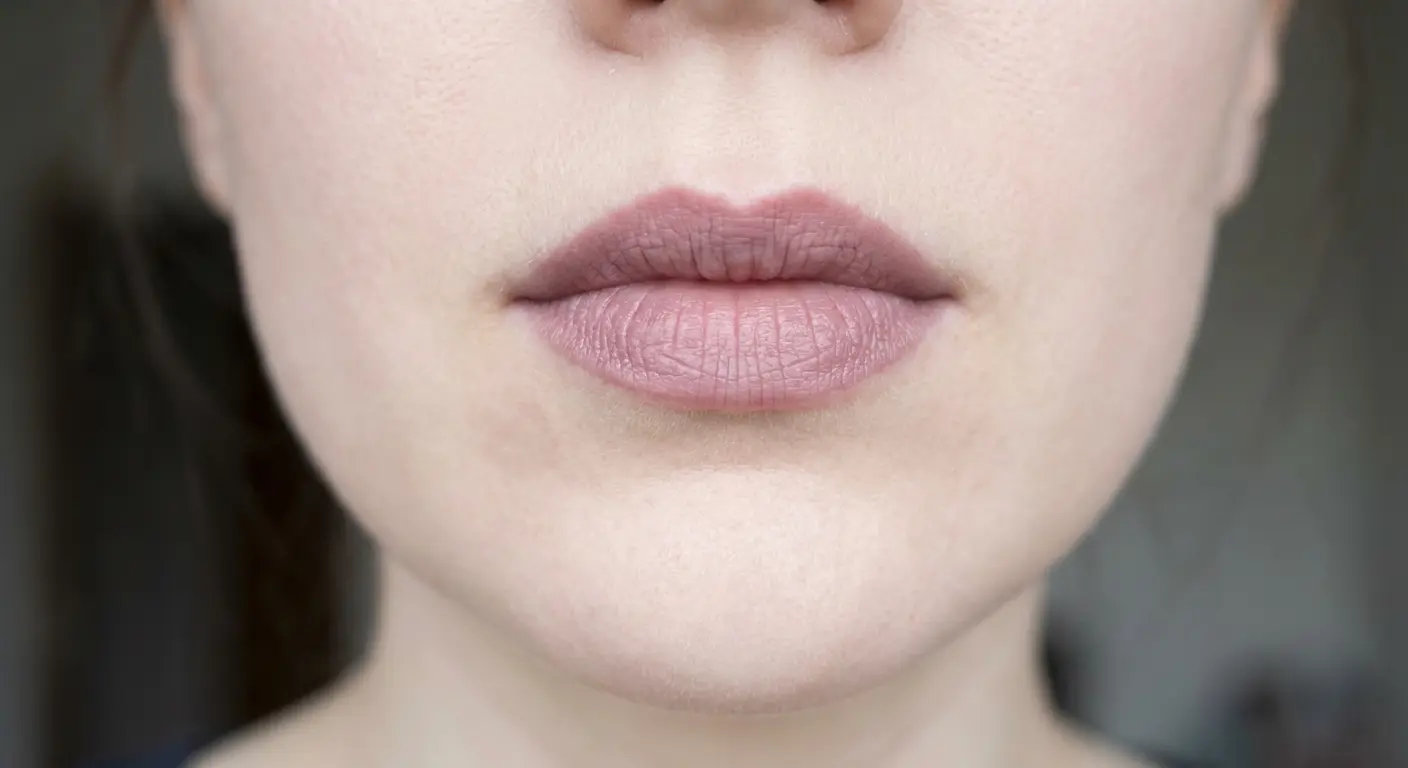
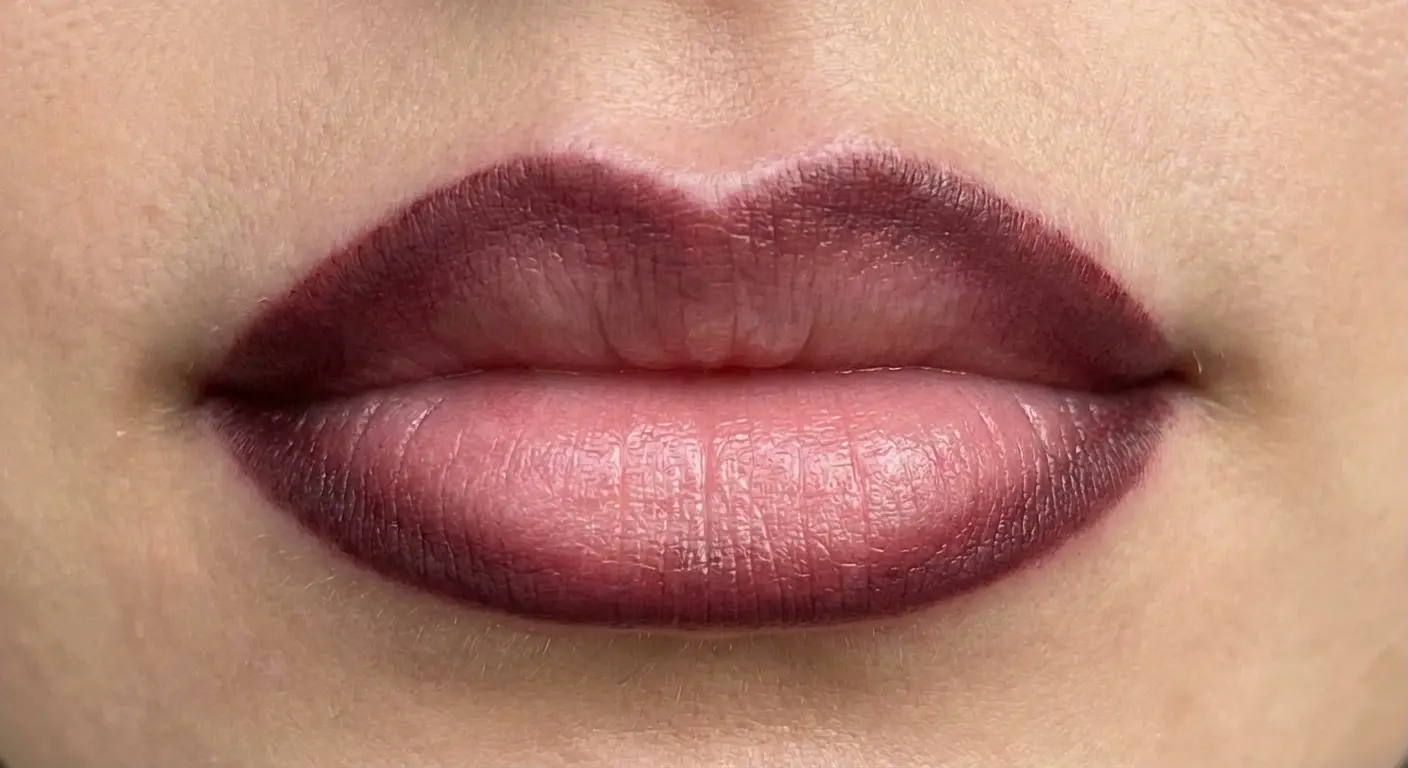
1. Nude Lip Blush for Everyday Wear
What is lip blushing? It’s creating the illusion of naturally fuller, more defined lips by adding a soft wash of color that’s only 1-2 shades darker than your natural tone. This is the most popular lip tattoo request we see, and it’s also the one that requires the most skill to execute properly.
You’re basically feathering pigment slightly beyond your natural lip line to create subtle volume. When done correctly, you can’t tell where your natural lip ends and the pigment begins. When done poorly, you get that obvious “drawn-on” look that screams amateur work.
Here’s what most people don’t realize about nude lip blush: mistakes are glaringly obvious. With bold colors, slight imperfections in application get masked by the intensity of the pigment. With nude shades that closely match your natural tone, every uneven line and patchy spot stands out. This is why choosing an experienced artist matters more for subtle work than bold work.

The color will look too dark initially. Everyone panics about this. You’ll leave your first session thinking your artist went way too heavy, but that’s normal. The pigment oxidizes and settles over the next 6 weeks, lightening by about 30-40% from that initial application. What looks alarmingly dark on day one becomes perfectly natural by week six.
This eliminates the need for daily lip liner, which is the real time-saver. You wake up with defined lips that look intentional without any product. You can throw on some gloss and go, or wear nothing at all and still look put-together.
Who shouldn’t get this? People with very thin lips expecting dramatic results. What is lip blushing if not a subtle enhancement technique? It creates gentle definition, not transformation. If you want significantly fuller lips, you need filler first, then tattooing to enhance the new shape. Touch-ups every 12-18 months keep things looking fresh and defined.
2. Soft Pink Definition Without the Drama
Soft pink definition focuses on enhancing the vermillion border (that’s the edge where your lip meets your skin). You’re adding a delicate pink that creates clarity without color intensity.
This works really well for people whose lip edges have faded with age or sun exposure. Over time, that crisp line between lip and skin softens and blurs, making lips appear less defined and sometimes smaller. Adding a soft pink border brings back that youthful definition without looking like you’re wearing makeup.
The difference between this and full lip blushing comes down to coverage area. We’re working just on that border, not filling in your entire lip. It’s the most conservative entry point into getting your lips tattooed, perfect for people who want enhancement but fear commitment to full color.
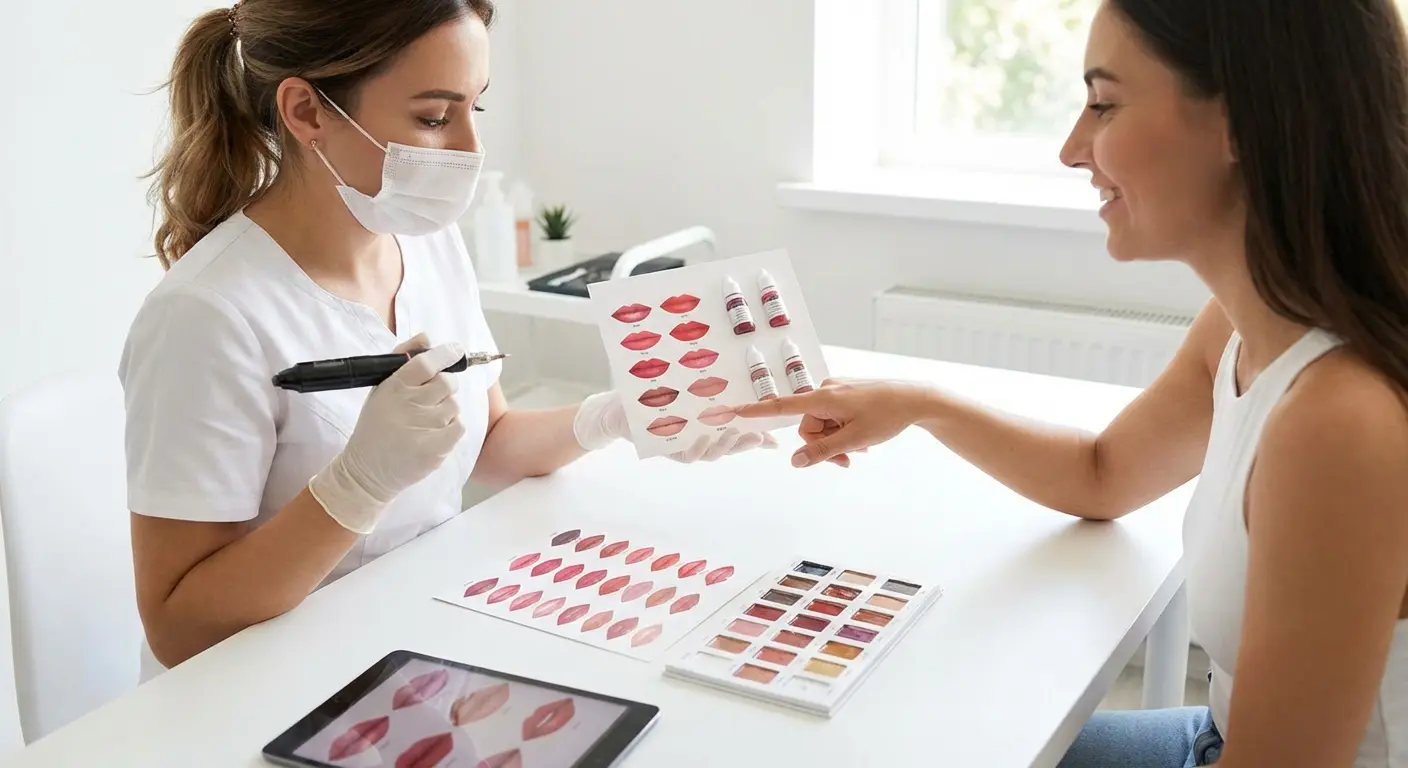
Pigment selection depends heavily on your skin tone. Cool-toned pinks can look chalky on warm-complexioned individuals, while warm pinks can appear too peachy on cool-toned skin. Your artist needs to understand undertones, not just surface color.
The healing process for border work is more predictable than full-coverage options. You’re working with less surface area, which means less opportunity for patchy healing. The color settles more evenly, and touch-ups are typically straightforward.
3. Peachy Coral That Warms Up Your Complexion
Peachy coral pigments add warmth and vitality to lips that appear washed out or pale. This works especially well for people with neutral to warm undertones who want a sun-kissed look year-round.
The science behind coral tones is interesting. They contain both pink and orange pigments, which affects how they fade. Pink molecules and orange molecules break down at different rates in your skin, which means coral can fade unpredictably. Sometimes it goes more pink, sometimes more orange, depending on your individual chemistry.
Real talk: this shade is notoriously difficult to maintain long-term. You’ll need touch-ups more frequently than with pure pink or pure nude tones. We’re talking every 10-12 months instead of 15-18 months. The orange component fades faster, leaving you with a pinker result than you started with.
The common mistake is going too orange. What looks beautifully coral in the pigment bottle can read as unnatural orange on your lips if the ratio isn’t carefully calibrated for your skin tone. Testing color intensity before committing to full coverage is essential.
How peachy tones interact with your natural lip pigmentation matters a lot. If you have very pink natural lips, adding coral creates a muddy result. If you have pale, neutral lips, coral adds beautiful warmth. Your starting point determines your ending point.
4. Natural Mauve for Cooler Undertones
Natural mauve combines pink and purple undertones to complement cooler skin tones without looking too pink or too purple. Getting this balance right takes real technical skill and experience.
Mauve is challenging to formulate. It requires precise pigment ratios to avoid turning muddy during healing. Too much purple and you look bruised. Too much pink and you’ve lost the mauve entirely. The sweet spot is narrow, and not every artist can hit it consistently.
This is an excellent choice for people with naturally purplish lips who want enhancement without fighting their natural coloring. Instead of trying to cover that purple tone with warmer pigments (which never works well), we’re working with it, enhancing what’s already there.
The risk with mauve is fading to an undesirable gray-purple if not properly maintained. Purple pigments are notoriously unstable. They can shift to cooler, ashier tones as they break down, especially if you’re not diligent about sun protection and touch-ups.
Choosing an artist experienced in cool-toned pigments is critical. Many artists work primarily with warm tones because they’re more popular and easier to formulate. Cool-toned work requires different pigment knowledge and color theory understanding. Ask to see healed mauve work from at least a year ago, not just fresh applications.
What to expect: you’ll see the truest mauve color around weeks 6-8 post-procedure. By month 18-24, it will have softened and potentially shifted slightly cooler. Touch-ups bring back that fresh mauve tone.
5. Barely-There Berry Stain
Barely-there berry creates the effect of having just eaten fresh berries, with a subtle stain that adds depth without obvious color. This is one of the most requested “natural” looks, and it’s deceptively complex
to execute.
How it works: multiple pigment layers to build dimension gradually. We’re not applying one solid color. We’re layering different berry tones (some redder, some more purple, some browner) to create that stained effect that looks effortless but requires significant skill.
This is ideal for people who want definition but fear looking “made up.” You get color and dimension, but it reads as your natural lip color enhanced rather than makeup applied. In photos, it looks beautiful. In person, some people find it too subtle for their preferences.
Session time for this delicate work extends beyond standard lip tattooing. Building those layers takes time, and rushing creates flat, artificial results. Not all artists offer this technique because it requires advanced shading skills and patience.
Healing peculiarities include longer initial healing periods and more dramatic color shifts. Each layer heals slightly differently, which can create temporary patchiness before everything settles into that cohesive stained effect.
6. Coffee Brown Contour Lines
Coffee brown contour lines define the lip perimeter with a rich brown that creates dimension and prevents lipstick from bleeding. This is really valuable for people experiencing age-related lip line blurring.
Brown pigments are more stable than reds or pinks. They contain iron oxides that resist fading, which means your contour lines stay crisp longer than full-color lip work. You’ll get 18-24 months between touch-ups instead of 12-15 months.
How it works: placing contour slightly inside the natural lip line versus directly on it. This creates a shadow effect that adds dimension and makes lips appear fuller. Placing lines too far outside the natural border looks obvious and artificial, and that’s the mistake that gives lip tattooing a bad reputation.
Common mistakes include going too dark initially. What seems like a subtle brown in the pigment bottle can look harsh on pale lips. Starting lighter and building up in subsequent sessions prevents that harsh, drawn-on appearance.
How brown contour interacts with overlaid lipstick colors is where this technique really shines. The brown creates a frame that prevents feathering and bleeding, keeping your lipstick exactly where you apply it. This is especially helpful for bold reds and deep berries that tend to migrate.
Maintenance is reasonable. Brown fades more slowly and evenly than other colors, so your touch-ups focus on maintaining definition rather than correcting color shifts.
7. Honey Beige Full Coverage
Honey beige provides complete lip coverage in a warm neutral that serves as a blank canvas for layering other lip products or stands alone for a sophisticated bare-lip look.
This shade is surprisingly versatile across multiple skin tones, from light to medium deep. The warm undertones complement a wide range of natural colorings without looking too pink, too brown, or too orange. It’s that perfect neutral that works.
Achieving even saturation without patchiness requires multiple sessions. Full coverage means covering every bit of your natural lip pigmentation with new color, which is harder than it sounds. Lips have varying levels of natural pigmentation across different areas, and achieving uniform color takes patience and skill.
Full coverage requires more sessions than partial work. You’ll need at least two sessions, possibly three, to build up enough pigment for complete, even coverage. Each session allows the previous layer to heal and settle before adding more pigment.
The psychological adjustment of seeing your lips in a completely different base color can be jarring. Your lips have looked one way your entire life, and suddenly they’re a different shade even without makeup. Give yourself time to adjust to the change before deciding whether you love or hate the result.
How honey beige fades is predictable and pleasant. It typically lightens to a peachy tone over time, which still looks natural and intentional. You won’t get the weird color shifts that happen with bolder pigments.
This option is popular among people who want to neutralize very dark or very pink natural lip pigmentation before adding their preferred colors on top. Think of it as creating a neutral base that makes your lipstick collection perform better. Colors apply more true-to-tube when you’re starting from a neutral canvas instead of fighting against purple or brown natural pigmentation.
When You’re Ready to Make a Statement
Fuck subtle. You want color. You want impact. You want people to notice your lips before they notice anything else about you.
Cool. But you need to know what you’re signing up for.
Bold statement lip tattoos embrace high-impact color for people who want their lips to be a focal point even without additional makeup. We’re talking saturated pigments that make an impression.
Maintenance challenges are real with intense colors. Bold colors require more frequent touch-ups than subtle shades because the pigment molecules that create vibrant color are larger and break down faster. Your lifestyle affects color longevity dramatically. Sun exposure, smoking, and certain skincare products all accelerate fading.
Understanding that bold lip tattoos will never maintain the same intensity as conventional lipstick is crucial. That lipstick tattoo you’re imagining? It won’t stay as vibrant as the tube you apply fresh every morning. Pigment in your skin behaves differently than pigment sitting on top of your skin.
Each design in this section focuses on maximizing color payoff while managing the inevitable fading that occurs with all lip tattooing. We’re being realistic about what’s achievable and sustainable.
|
Bold Color Choice |
Typical Longevity Before Touch-Up |
Primary Fading Pattern |
Maintenance Difficulty |
Best For |
|---|---|---|---|---|
|
Classic Red |
8-12 months |
Fades to pink or coral |
High |
Medium to deep skin tones with warm undertones |
|
Deep Burgundy |
12-16 months |
Softens to berry tone |
Moderate |
All skin tones; ages gracefully |
|
Hot Pink |
6-8 months |
Rapid lightening |
Very High |
Fair to medium skin; requires aggressive touch-ups |
|
Plum Wine |
10-14 months |
Fades to mauve-gray if not maintained |
Moderate |
Cool to neutral undertones |
|
Brick Red |
12-15 months |
More stable due to orange pigments |
Low to Moderate |
Warm undertones; naturally warm lips |
|
True Cherry |
8-10 months |
Separates to pink or red depending on undertone |
High |
Requires experienced artist; unpredictable |

8. Classic Red That Never Fades (Except It Does)
Classic red lip tattooing attempts to replicate the timeless appeal of red lipstick, but we need to address the elephant in the room: “never fades” is technically impossible. All lip pigments fade. Red just fades to pink or coral, which might still look good but isn’t the red you started with.
Multiple red undertones exist in permanent cosmetics. Blue-red creates that classic, cool-toned red you see in vintage Hollywood photos. Orange-red gives you a warmer, more modern red. Choosing wrong for your skin tone creates an unflattering look that you’ll regret every time you look in the mirror.
Red pigments are notoriously unstable in lip tissue. The molecules that create true red are large and complex, which makes them more susceptible to breakdown from UV exposure, cellular turnover, and general wear. You’ll see noticeable fading within 8-12 months.
The common disappointment happens when red heals to pink initially. During that first healing phase, red pigment can look alarmingly pink or coral. Most of the red tone returns as healing completes, but that initial shock sends people into panic mode.
Are you a good candidate for red based on your natural lip color and lifestyle? If you have very pale lips, achieving true red requires multiple sessions to build up enough pigment. If you spend significant time in the sun without protection, your red will fade to pink within months. If you’re willing to commit to touch-ups every 8-10 months and diligent sun protection, red can work beautifully.
9. Deep Burgundy for Maximum Impact
Deep burgundy combines red with purple and brown undertones to create a sophisticated, high-drama look that works really well on medium to deep skin tones. This is one of the more forgiving bold colors because it ages gracefully.
Multiple pigment layers are necessary to achieve depth. Single-layer burgundy looks flat and artificial, missing that dimensional richness that makes burgundy beautiful. Building color gradually across sessions creates depth that photographs well and looks natural in person.
How this shade ages into a softer berry tone over time is one of its advantages. Even as it fades, burgundy remains attractive. You won’t get that washed-out, unrecognizable color that happens with some bold pigments.
Burgundy is easier to maintain than pure red despite being darker. The brown and purple undertones are more stable than pure red pigments, which means slower, more even fading. You’ll get 12-16 months between touch-ups instead of 8-10 months.
Building color gradually across sessions matters. Rushing to full saturation in one appointment leads to uneven results and potential pigment rejection. Your skin can only accept so much pigment at once.
How burgundy interacts with different lighting conditions is worth considering. It can appear nearly black in low light, which might be more dramatic than you want. In natural light, it shows as rich wine. Make sure you’re comfortable with that range before committing.
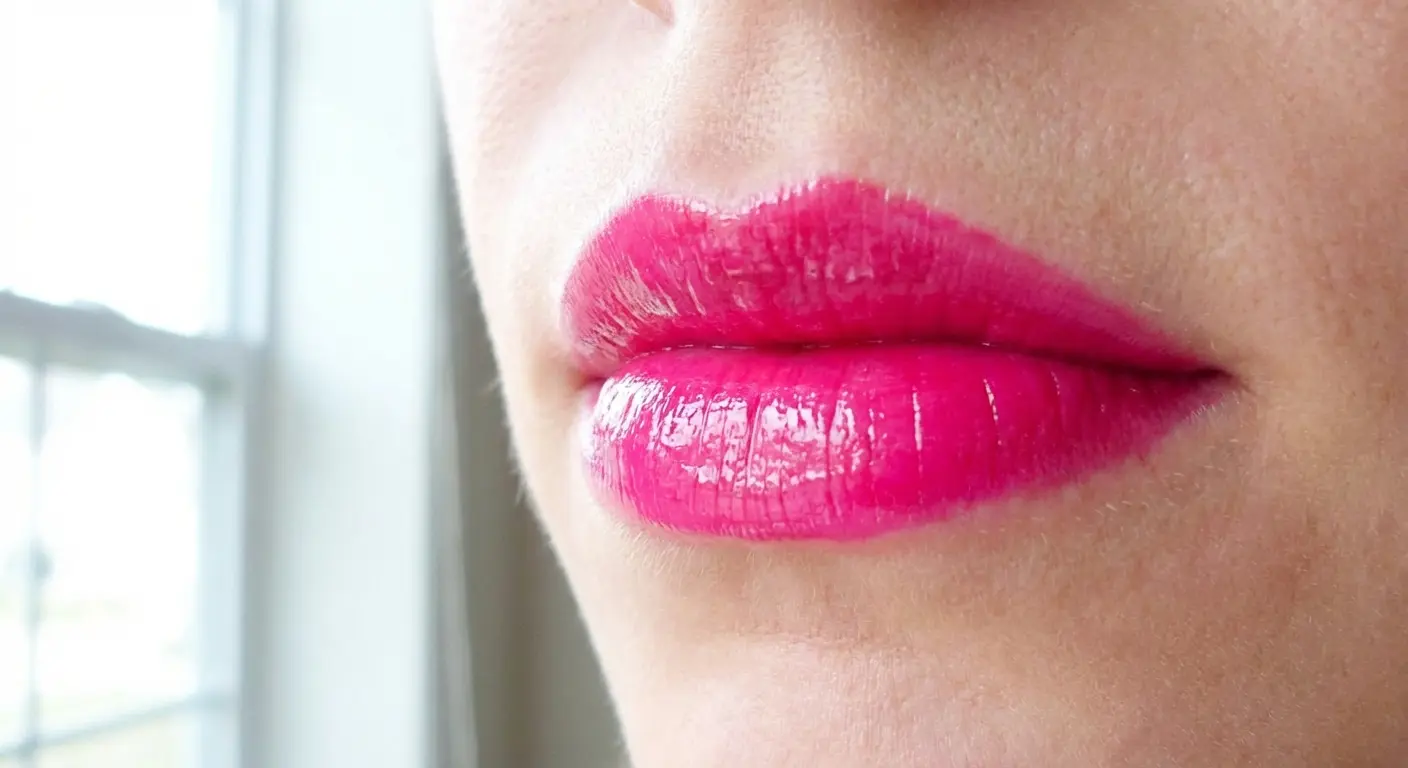
10. Hot Pink That Commands Attention
Hot pink lip tattooing is the most high-maintenance option in permanent cosmetics. We’re not exaggerating. This requires aggressive touch-up schedules and careful lifestyle modifications to maintain vibrancy.
Hot pink is a commitment relationship with trust issues. You’ll need touch-ups every 6-8 months (sometimes sooner). You’ll need to avoid sun like you’re a vampire. You’ll watch it fade from hot pink to medium pink to sad pink to basically-nude in real-time. It’s exhausting.
Am I saying don’t get it? No. I’m saying know what you’re signing up for. This is not a low-maintenance color choice.
Hot pink contains the most unstable pigment molecules. They’re larger and break down faster than any other color in the permanent cosmetics spectrum. You’ll see noticeable lightening within 6-8 months, sometimes sooner if you’re not careful about sun protection.
Who should avoid hot pink entirely? People with very pale lips will see dramatic fading because there’s no natural pigmentation to help hold the color. Those with darker lips won’t achieve true hot pink without aggressive lightening first, which we don’t recommend because it damages lip tissue and creates unpredictable results.
Layering pink over white base pigment increases vibrancy, but it also increases complexity and healing time. You’re essentially getting two tattoos: a white base layer, then pink on top. Each layer needs to heal before adding the next.
Hot pink photographs beautifully. It pops in photos, looks vibrant and exciting. In person, especially in natural light, it can look less intense than you expect. Camera sensors love hot pink. Human eyes see it more accurately, which means seeing the imperfections and fading.
11. Plum Wine with Purple Undertones
Plum wine creates a rich, dimensional look by combining red, purple, and brown pigments in varying ratios to suit different skin tones and undertones. Getting this balance right requires an artist who understands color theory deeply.
Plum is more forgiving than pure purple, which can look bruised on some skin tones. The red and brown components warm it up enough to look intentional rather than accidental.
Artists adjust the red-to-purple ratio based on your natural lip color. If you have very pink lips, we add more purple to create plum. If you have brown-toned lips, we add more red. The formula isn’t one-size-fits-all.
This shade ages more gracefully than brighter options. As it fades, it softens to a berry-mauve that still looks intentional and attractive. You won’t hit a point where it looks bad; it just looks softer.
The risk of plum fading to an undesirable mauve-gray happens if the formula isn’t properly balanced or if you skip touch-ups for too long. Purple pigments can shift cooler and ashier as they break down, especially without the red and brown components to keep them warm.
This color requires an experienced artist who understands color theory. Mixing purple, red, and brown pigments to create a cohesive plum that will heal and age well isn’t beginner-level work. Ask to see healed plum work from at least a year ago, not just fresh applications.
12. Brick Red with Orange Notes
Brick red incorporates orange undertones to create a warm, earthy alternative to classic red that complements warm skin tones and looks less artificial as it fades.
Brick red is more stable than cool-toned reds. The orange pigments are smaller molecules that resist breakdown better than the complex molecules that create blue-based reds. You’ll get 12-15 months between touch-ups instead of 8-10 months.
This shade works really well for people with naturally warm-toned lips. Instead of fighting against your natural coloring, we’re enhancing it. The result looks cohesive and intentional rather than obviously tattooed.
Common concerns about looking too orange are valid but manageable. Balancing red and orange pigments to achieve brick without crossing into terra cotta territory takes skill. Too much orange and you’ve lost the red entirely. Too much red and you’ve lost the warmth that makes brick special.
This shade photographs as more muted than it appears in person. While hot pink and classic red pop in photos, brick red reads as more subdued. In person, it has beautiful depth and warmth that cameras don’t always capture.
Adjusting the formula for different skin depths is essential. Brick red on fair skin needs less orange than brick red on deep skin, where more orange prevents the color from looking too dark or muddy.
13. True Cherry Bomb
True cherry aims for that perfect bright red-pink hybrid that evokes fresh cherries, but achieving and maintaining this tone requires significant technical skill and client commitment.
Cherry is one of the most requested but hardest colors to maintain. It requires both red and pink pigments that fade at different rates, which means your cherry can shift toward pink or toward red depending on which pigment your body breaks down faster.
Building cherry intensity without going too pink or too red is delicate. We’re walking a tightrope between two colors, trying to land in that sweet spot that reads as cherry.
Cherry looks different on every person based on their natural lip pigmentation. Two people can get the same cherry formula and have completely different results because their starting points are different.
What to expect: cherry typically softens to pink within 12 months without touch-ups. The red component fades faster, leaving you with the pink base. Some skin types simply can’t hold cherry tones. Your body chemistry might break down one pigment component so much faster that maintaining the balance becomes impossible.
Test patches before committing to full lips are critical with cherry. A small test area shows you how your skin accepts and retains the specific pigment blend, giving you realistic expectations before covering your entire lips.
14. Fuchsia Fade from Center Out
Fuchsia fade creates a gradient effect with the most intense color at the center of the lips, gradually softening toward the edges for a dimensional, modern look.
The advanced technique required to achieve smooth color transitions without harsh lines takes significant skill and experience. Gradient work is harder than solid color application because you’re managing multiple color intensities simultaneously.
Gradient work takes way longer than solid color application. You’re not just filling in your lips with one color. You’re carefully building transitions, which requires precision and patience.
How fuchsia behaves in gradient application presents unique challenges. The intense center fades faster than the subtle edges, potentially reversing your intended effect. You start with bright center and soft edges, but after 6-8 months, you might have medium center and very soft edges, losing that dramatic gradient.
Healing expectations for gradient work include looking uneven during healing before settling. The different color intensities heal at different rates, creating temporary patchiness that resolves as healing completes.
Does this style suit your lifestyle? Gradient lips are trendy and editorial, which means they might look dated in a few years. They also require more maintenance than solid color to keep those transitions smooth and intentional-looking.
15. Orange-Red That’s Warmer Than Classic
Orange-red pushes further into warm territory than brick red, creating a vibrant, energetic look that works beautifully on warm-toned skin but can clash with cool undertones.
This shade sits between true orange and true red, giving you warmth without going full coral. It’s bolder than brick red but more wearable than straight orange.
Orange pigments are relatively stable, which means this fades more predictably than cool reds. You’ll see gradual lightening to a peachy-coral over time, which still looks intentional.
The main consideration is whether your skin tone can support this much warmth. On cool-toned skin, orange-red can look jarring or unflattering. On warm-toned skin, it looks vibrant and cohesive.
This photographs really well in natural light, bringing warmth and dimension to your face. It’s a great choice for people who want bold color that doesn’t read as “traditional” red lipstick.
The Weird and Wonderful
Look, I’m spending less time on these because maybe 5% of you will actually get them. These are for the makeup artists, the Instagram beauty people, or those going through a very specific phase.
Creative edge lip tattoos push beyond traditional cosmetic tattooing into artistic expression. We’re incorporating techniques borrowed from body tattooing and makeup artistry to create looks that make lips a canvas for self-expression.
Higher risk factors are real with creative work. These designs age less predictably than traditional cosmetic work. They require artists with both cosmetic and artistic tattooing experience, which is a rare combination. They may not be suitable for professional environments where conservative appearance matters.
Finding an artist who does creative cosmetic work is challenging. Most cosmetic tattoo artists focus on natural enhancement. Most body tattoo artists don’t work on lips. You need someone who bridges both worlds, and that’s a small pool of professionals.
What to expect: fine details blur, bright colors fade, complex designs simplify. What looks intricate and detailed fresh will look softer and less defined in a year.
Are you comfortable having artistic lips in job interviews? At family gatherings? In five years when trends have changed? Think about it.
16. Ombré Gradient from Dark to Light
Ombré lip tattooing creates a smooth transition from darker outer edges to lighter centers, or vice versa, adding dimension and the illusion of fuller lips through strategic shading.
Achieving seamless gradients in lip tissue is complicated. Lips heal unpredictably, and that unpredictability is amplified when you’re working with multiple color intensities. What looks like a smooth gradient fresh can develop harsh lines during healing.
Ombré requires multiple sessions to perfect the transitions. You can’t achieve smooth, professional-looking gradients in one session. The first session establishes the general gradient. Subsequent sessions refine the transitions and correct any harsh lines that developed during healing.
Different color combinations create different effects. Dark brown to nude creates a natural, dimensional look. Burgundy to pink gives you drama with sophistication. Red to coral provides warmth and vibrancy.
Some gradients age better than others. Gradients using similar color families (like burgundy to pink) age more gracefully than gradients using contrasting colors (like brown to pink), which can develop a muddy middle zone as colors blend during fading.
Ask to see photos from 6-12 months post-procedure, not just fresh work. Fresh ombré always looks smooth. Healed ombré reveals the artist’s true skill level.
17. Two-Tone Split Design
Two-tone split designs place different colors on upper versus lower lips or split each lip vertically, creating an editorial, avant-garde look that’s definitely not for everyone.
This technique requires exceptional precision to prevent colors from bleeding into each other during healing. Lips are constantly moving, constantly exposed to moisture, which makes maintaining clean color separation challenging.
The limited number of artists who offer this service reflects its difficulty. This is considered advanced creative work that requires both technical skill and artistic vision. Most cosmetic tattoo artists won’t attempt it.
Does this bold choice suit your personal style and professional life? Two-tone lips make a statement. You’ll get attention, both positive and negative. Make sure you’re comfortable with that level of visibility.
Color pairing strategies that create cohesion include using colors from the same family (like pink and berry) or using complementary colors that balance each other (like red and nude). Avoid pairing colors that clash or create muddy results when they inevitably blend slightly at the border.
The extended healing process involves managing two different pigments healing at potentially different rates. One color might settle quickly while the other goes through dramatic color shifts, creating temporary imbalance.
18. Glitter-Effect Shimmer Overlay
Glitter-effect shimmer uses specialized pigments that contain light-reflecting particles to create subtle sparkle without actual glitter, mimicking the effect of shimmery lip gloss.
This technique is controversial in the permanent cosmetics community. Some professionals consider it unsafe, citing concerns about metallic particles in lip tissue. Others use approved cosmetic-grade shimmer pigments and report no issues. Research your artist’s pigment sources and safety protocols carefully.
The difference between shimmer overlay on colored lips versus nude lips is significant. Shimmer over color creates a glossy, dimensional effect. Shimmer over nude lips can look frosty or chalky if not done carefully.
How shimmer particles behave during healing and long-term is still being studied. Some clients report the shimmer effect fading within 6-8 months, leaving just the base color. Others maintain subtle sparkle for years.
The realistic appearance of tattooed shimmer is subtle, not disco-ball obvious. You’ll see a gentle light-catching effect in certain angles and lighting, not constant glitter. If you’re expecting the intensity of glitter lip gloss, you’ll be disappointed.
Shimmer fades faster than base colors because the reflective particles break down or become encapsulated by tissue, reducing their light-reflecting properties. Plan for touch-ups every 8-10 months if maintaining the shimmer effect matters to you.
Safety concerns about metallic particles in lip tissue are worth discussing with your artist. Ask about the specific pigments they use, whether they’re FDA-approved for cosmetic use, and what their long-term client outcomes have been.
19. Metallic Rose Gold Finish
Metallic rose gold combines pink undertones with metallic shimmer to create a futuristic, editorial effect that’s gained popularity through social media but remains rare in real-world application.
The specialized pigments required for metallic effects contain mica or similar mineral particles that create that metallic sheen. Not all pigment manufacturers produce these, and not all artists are willing to use them.
Finding an artist who offers this service is challenging. Many won’t use metallic pigments due to safety concerns or lack of training. Those who do offer it typically charge premium prices because of the specialized nature of the work.
The unpredictable aging of metallic finishes is a significant consideration. We don’t have decades of data on how these pigments behave long-term because they’re relatively new to the permanent cosmetics industry.
How rose gold appears on different skin tones varies dramatically. On very dark lips, it can look muddy or barely visible. On very pale lips, it can read as too pink without enough metallic effect. Medium skin tones typically see the truest rose gold result.
The maintenance required to keep the metallic effect visible is intensive. The metallic particles degrade or become less reflective over time, requiring touch-ups every 6-8 months to maintain that sheen.
Will this trend-driven choice age well or look dated in five years? That’s the gamble with any trendy cosmetic procedure. Rose gold is having a moment now, but trends change. Consider whether you’ll still love this look when it’s no longer popular.
20. Frosted Lavender Tips
Frosted lavender tips place pale purple pigment on the center or edges of lips to create an ethereal, otherworldly effect inspired by editorial makeup.
Lavender is one of the most difficult colors to achieve in lip tattooing. It requires purple pigment without red undertones, which is technically challenging to formulate. Most purple pigments contain some red, which warms them up and prevents that true lavender tone.
The risk of lavender fading to gray or blue is substantial. Purple pigments are unstable and can shift to cooler, ashier tones as they break down. Without careful formulation and diligent maintenance, your lavender can become an unflattering gray-blue.
This look works better as an accent than full coverage. Lavender tips or center highlights create interest without overwhelming your face. Full lavender lips can look costume-like or bruised, depending on the shade and your skin tone.
Placement strategies for lavender accents include center highlighting to create a gradient effect or edge definition for an unconventional border. Both require precision to avoid looking accidental.
Frosted effects require lighter base pigments underneath to create that frosted appearance. You’re essentially lightening the area first, then adding the lavender on top. This multi-step process extends healing time and increases complexity.
Pale purple tones in lip tissue fade within 6-8 months. Pale colors always fade faster than deep colors because there’s less pigment to begin with.
21. Blackberry Stain with Blue Base
Blackberry stain uses blue-based purple pigments to create a deep, moody effect that’s gained traction in alternative beauty communities.
Blue-based pigments behave differently than red-based ones in lip tissue. They can appear bruised during healing, which freaks people out. That bruised appearance typically resolves as healing completes, but those first two weeks can be alarming.
Blue-based colors may fade to unexpected gray-blue tones if not properly formulated or maintained. The blue component can dominate as red and purple components fade, leaving you with a cooler, ashier result than you intended.
Understanding your natural lip undertones before adding blue-based colors is essential. If you have warm-toned lips naturally, adding blue-based purple creates a clash that never looks quite right. Cool-toned lips accept blue-based purples more harmoniously.
Who should avoid this entirely? People with very warm skin tones or naturally warm lips will struggle to make blackberry work. The blue base fights against warm undertones, creating muddy or unflattering results.
Building blackberry depth through multiple layers creates that rich, dimensional color that makes this shade appealing. Single-layer application looks flat and artificial.
This shade photographs dramatically different than it appears in person. Camera sensors struggle with deep purples, often rendering them as black or brown. In person, you’ll see the purple undertones clearly, but photos might not capture them accurately.
Without aggressive touch-ups every 8-10 months, your blackberry will shift toward standard purple as the blue component fades faster.
Fixing What’s Actually Wrong
Corrective lip tattooing addresses medical, structural, or pigmentation issues rather than purely aesthetic goals. This is where permanent cosmetics demonstrates genuine value beyond vanity.
Corrective work requires the highest level of technical skill. You’re working with damaged or irregular tissue, which behaves differently than healthy tissue. Scar tissue doesn’t accept pigment the same way. Asymmetrical lips require understanding of facial proportions and optical illusions. Medical conditions add complexity that purely cosmetic work doesn’t involve.
Insurance coverage possibilities for medical tattooing exist in some cases. Procedures addressing scarring from medical conditions, vitiligo, or other documented medical issues may qualify for partial coverage. Check with your insurance provider and get documentation from your doctor.
Realistic expectations matter here. We can significantly improve most issues, but perfection isn’t always achievable. Scar tissue will always behave differently than normal tissue. Severe asymmetry can be balanced but not eliminated entirely.
Success is measured by how well the work blends with your natural features rather than how bold or beautiful it appears. The goal is making the problem less noticeable, not creating a showpiece.
According to DAELA Cosmetic Tattoo, lip blush tattoos can last 2-3 years, though some clients seeking corrective solutions for issues like scarring or sun damage may choose to refresh their lips as often as every 6 months if lifestyle factors have caused accelerated fading.
22. Scar Coverage Blending
Scar coverage blending uses color-matched pigments to minimize the appearance of lip scars from injuries, surgeries, or conditions like cleft lip repair.
Scar tissue accepts and retains pigment differently than normal tissue. It’s denser, less vascular, and often has different texture. This means it may require more sessions to achieve color saturation, and even then, you may never achieve perfect color match with surrounding tissue.
Waiting until scars are fully mature before tattooing is critical. Tattooing immature scars can interfere with healing and create worse outcomes. Most surgeons recommend waiting 12-18 months post-injury or post-surgery before attempting cosmetic tattooing.
Realistic expectations for improvement vary based on scar type and severity. Some scars can be significantly improved, becoming barely noticeable. Others only see modest changes because the texture differences remain even when color is matched.
Different scar types respond differently to tattooing. Raised scars (hypertrophic or keloid) are challenging because the texture remains obvious even when color is matched. Depressed scars create shadows that pigment can’t eliminate. Discolored scars often respond best because color correction is more straightforward than texture correction.
The emotional impact of scar camouflage work extends beyond physical appearance. For many people, visible scars carry psychological weight, reminders of trauma, illness, or difficult experiences. Reducing their visibility can provide genuine emotional relief and improved quality of life.
23. Asymmetry Correction Through Shading
Asymmetry correction uses strategic pigment placement and shading to create the illusion of balanced lips when natural asymmetry exists.

The technique involves adding shadow to larger areas while highlighting smaller areas to equalize visual weight. We’re using light and dark to trick the eye into perceiving balance where actual asymmetry exists.
Complete symmetry is neither possible nor desirable. Perfectly symmetrical features look unnatural and uncanny. The goal is reducing noticeable asymmetry, not creating mirror-image perfection.
How to identify whether your asymmetry is correctable through tattooing: if the asymmetry is primarily about color, definition, or subtle volume differences, tattooing can help. If it’s about significant structural differences or volume discrepancies, you need filler or surgery first.
Common asymmetry patterns include one side fuller than the other, uneven cupid’s bow where the peaks don’t align, and off-center peaks that make your mouth appear crooked.
Pigment creates optical illusions through color and shading. It can’t add actual volume or change actual structure. Severe asymmetry requires structural correction before cosmetic tattooing can refine the results.
Working with an artist who understands facial proportions and optical illusions is essential. This isn’t just about applying pigment. It’s about understanding how the eye perceives balance and using color strategically to create that perception.
24. Vitiligo Camouflage Matching
Vitiligo camouflage tattooing restores pigment to depigmented lip areas, matching the color to surrounding healthy tissue or creating uniform color across both affected and unaffected areas.
Vitiligo tattooing is medically recognized and sometimes insurance-covered, unlike purely cosmetic work. This is a legitimate medical procedure addressing a documented condition, which changes how it’s classified and potentially how it’s covered financially.
The technical challenges of matching pigment to living tissue that may continue changing are significant. Vitiligo can be progressive, meaning new areas may depigment after you’ve had tattooing done. Your artist needs to discuss this possibility and plan accordingly.
The emotional significance of this work for people with visible vitiligo extends beyond aesthetics. Vitiligo, especially on highly visible areas like lips, can affect self-esteem, social comfort, and quality of life. Camouflage work provides relief from constant visibility and unwanted attention.
The two-approach strategy includes matching healthy tissue by color-matching pigment to your remaining natural lip color and filling in depigmented areas, or creating entirely new uniform color across your entire lips, essentially starting fresh with a chosen shade.
Vitiligo-affected skin may not retain pigment as well as healthy skin. The melanocytes that normally help stabilize pigment are absent in vitiligo-affected areas, which can lead to faster fading. Plan for more frequent touch-ups in affected areas.
Finding artists trained in medical tattooing versus standard cosmetic work is important. Medical tattooing requires additional training in working with compromised tissue, understanding medical conditions, and managing unique challenges that cosmetic work doesn’t involve.
25. Age Spot Neutralization
Age spot neutralization addresses dark spots, sun damage, and hyperpigmentation on lips through color correction techniques that neutralize unwanted pigmentation.
This requires understanding color theory. Certain pigment colors cancel out specific types of hyperpigmentation. Orange neutralizes blue-brown spots. Peach neutralizes purple-brown spots. Your artist needs to assess your specific hyperpigmentation and choose the correct neutralizing color.
The multi-step process involves first neutralizing dark spots with corrective pigment, allowing that to heal, then adding overall color if desired to create uniform appearance. You can’t just cover dark spots with your desired lip color because they’ll show through. You need to neutralize them first.
This work is highly technical and not offered by all cosmetic tattoo artists. It requires advanced color theory knowledge and experience working with hyperpigmentation.
Realistic expectations for spot coverage: some deeply pigmented areas may only lighten, not disappear completely. The underlying hyperpigmentation can still influence the final result, especially if it’s very dark or very extensive.
Sun protection after treatment to prevent new spots from forming cannot be overstated. If you don’t protect your lips from sun exposure, you’ll develop new age spots and sun damage, requiring additional correction work.
How age spot work integrates with overall lip enhancement for comprehensive rejuvenation: many clients addressing age spots also want general color enhancement, definition improvement, or other cosmetic benefits. Combining corrective work with enhancement work creates comprehensive results that address both problems and aesthetic goals.
Before You Book Your Session
You’ve seen what’s possible, but choosing the right lip tattoo design is only half the equation. Finding an artist who can execute your vision safely and skillfully is where most people drop the ball.
Most people focus entirely on design selection while overlooking artist vetting, which is where most lip tattoo disappointments originate. You need someone who understands pigment behavior in mucosal tissue, has extensive experience with your skin tone, and can show you healed work, not just fresh applications that always look perfect.
Research takes time, but rushing into an appointment with an underqualified artist costs you more in corrections, removal attempts, and emotional distress than the hours spent finding the right professional.
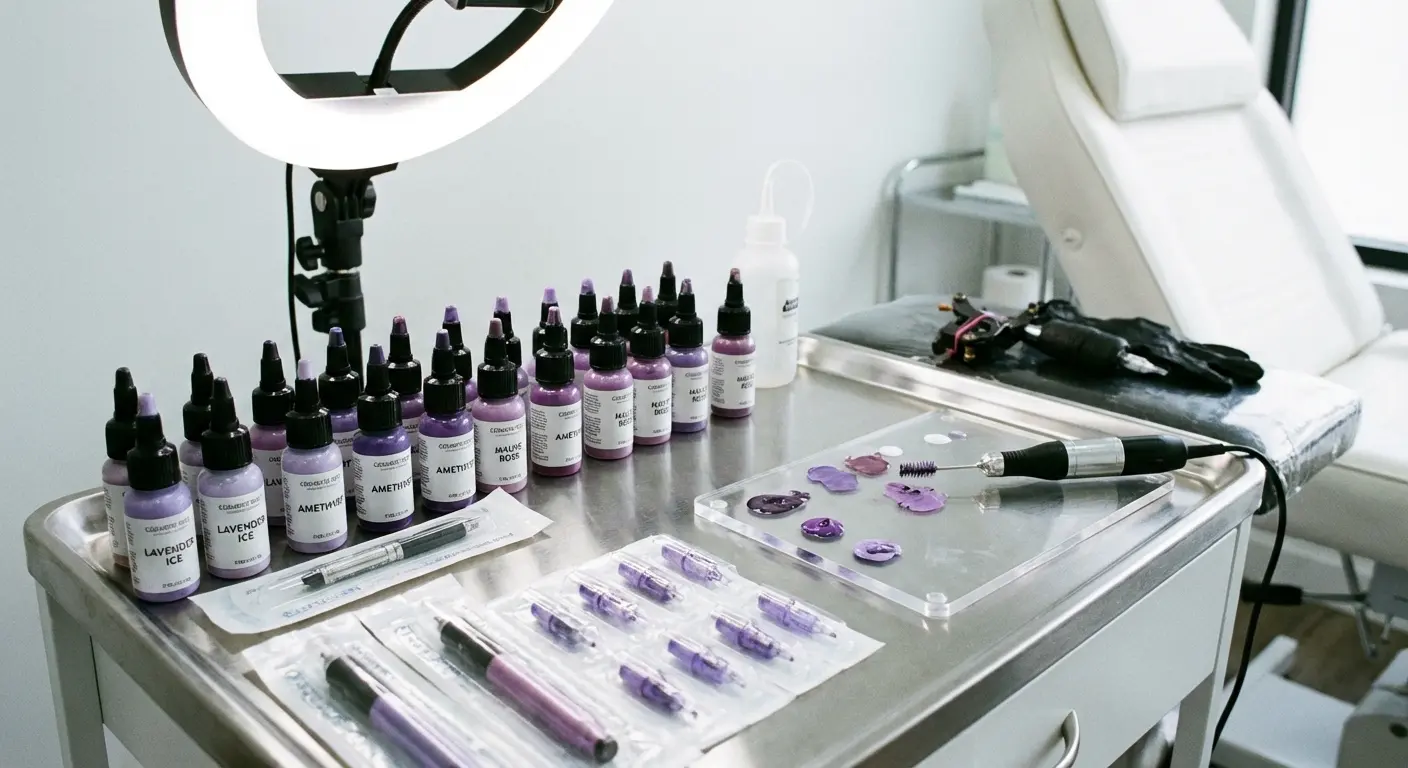
What proper safety looks like:
Your artist should:
-
Use new, sterile needles opened in front of you
-
Wear gloves (and change them if they touch anything non-sterile)
-
Use disposable or properly sterilized equipment
-
Have an autoclave on-site for sterilization
-
Use pigments from sealed containers (not shared pots)
-
Work in a clean, professional space
-
Follow bloodborne pathogen protocols
You should see:
-
Sharps containers for used needles
-
Single-use items being thrown away after your session
-
Clean workstation setup
-
Licensing displayed
If any of this is missing, leave.
Check credentials and certifications for permanent cosmetics. Body tattoo licenses don’t automatically qualify someone for cosmetic tattooing. Look for training from recognized permanent cosmetics schools and ongoing education in the field.
Review portfolios critically, focusing on healed results from at least 6-12 months post-procedure. Fresh work always looks good. Healed work reveals true skill level.
Ask about pigment brands and safety protocols. Quality pigments matter for color retention and safety. Your artist should be transparent about what they use and why.
Discuss your medical history thoroughly. Certain conditions and medications affect how you heal and retain pigment. Autoimmune conditions, blood thinners, and some skincare ingredients can all impact results.
Medications that affect lip tattooing:
Avoid or discuss with your doctor:
-
Blood thinners (aspirin, warfarin, etc.) which cause excessive bleeding and poor pigment retention
-
Accutane/isotretinoin (must be off it for 6-12 months first)
-
Retinols/retinoids (stop 2 weeks before, resume 4 weeks after)
-
Antibiotics (can affect healing)
-
Immunosuppressants (healing complications)
-
Some acne medications (skin too sensitive)
Also problematic:
-
Fish oil supplements (blood thinner)
-
Vitamin E (blood thinner)
-
Ibuprofen (blood thinner)
Switch to Tylenol for pain management before/after procedure.
Pregnancy and breastfeeding:
Don’t get lip tattoos if you’re:
-
Pregnant (risk to baby, unpredictable healing due to hormones)
-
Breastfeeding (pigment could transfer, not worth the risk)
-
Trying to conceive (hormones affect pigment retention)
Wait until:
-
After pregnancy and done breastfeeding
-
Your hormones have stabilized (3-6 months post-breastfeeding)
Why? Pregnancy hormones make pigment behave unpredictably. You might get patchy results, weird color changes, or total rejection. Plus, numbing medications aren’t safe during pregnancy.
Understand the full cost including touch-ups. That initial session price isn’t your total investment. Factor in the required touch-up sessions and ongoing maintenance when budgeting.
The real cost over 10 years:
Initial: $600-800
Year 1 touch-up: $400
Years 2-10 touch-ups (every 12-18 months): $400 × 6-8 = $2,400-3,200
Total: $3,400-4,400 over a decade
Compare that to:
-
High-end lipstick ($30 × 12 months × 10 years = $3,600)
-
Drugstore lipstick ($8 × 12 months × 10 years = $960)
-
Lip liner + lipstick combo ($50/year × 10 = $500)
Makes sense if you’re a high-end product person. Doesn’t make sense if you’re a drugstore person or barely wear lip color.
Run if your artist:
-
Can’t show you healed work from 6+ months ago (only shows fresh)
-
Works out of their home without proper licensing
-
Doesn’t ask about your medical history
-
Promises exact results or “permanent” color
-
Uses the same pigment on everyone regardless of skin tone
-
Doesn’t do a consultation first
-
Pressures you to book immediately
-
Has a portfolio that’s all filters and perfect lighting
-
Can’t explain their pigment brands or safety protocols
-
Offers prices way below market rate
If an artist charges $200 for lip tattooing, run. They’re either inexperienced, using cheap pigments, or both. Quality work costs $400 minimum, and usually more.
Final Thoughts
So Should You Do This?
Maybe. Probably not if you’re impulsive and found this article at 2am after seeing someone’s fresh lip tattoo on TikTok. Definitely not if you’re doing it because your partner suggested it.
Do it if you’re tired of your lipstick feathering. Do it if you have scarring or asymmetry that bothers you daily. Do it if you’ve researched artists for months and have realistic expectations.
Don’t do it to look like someone else. Don’t do it because you’re bored. Don’t do it because it seems easier than learning to apply lipstick properly.
The best lip tattoo is one you’ll still appreciate in five years, not just five days after healing. Consider how your choice will age, how it fits your lifestyle, and whether you’re truly ready for the maintenance commitment. This isn’t a decision to make impulsively based on a trend you saw on social media or a celebrity’s latest look.
Aftercare is a part-time job for two weeks. You’ll set phone alarms to apply ointment. You’ll carry supplies everywhere. You’ll explain to everyone why you can’t go to that restaurant (too spicy), that pool party (chlorine), or that beach day (sun + salt water = disaster).
No hot showers hitting your face. No face-down sleeping. No sweaty workouts. No steamy bathrooms. You’ll be patting your face dry like it’s made of tissue paper and sleeping on your back even though you’re a stomach sleeper.
Stuff nobody mentions:
-
Your lips will feel like they don’t belong to your face for about 2 weeks
-
You’ll become weirdly aware of your lips constantly, how they move, how they feel, how they look
-
Drinking from water bottles is harder than you’d think
-
You’ll develop strong opinions about lip balm brands you never cared about before
-
People will ask if you got lip filler (because of the swelling)
-
You might temporarily lose some sensation (it comes back, but it’s freaky)
Your lips will swell. Like, you-look-like-you-had-an-allergic-reaction swell. For 2-3 days. Plan accordingly. Don’t schedule this before your sister’s wedding or a job interview.
Timeline from decision to final results:
Week 0: Research and consultations (budget 2-4 weeks for this)
Week 4-6: First session (once you’ve chosen artist and booked)
Week 10-12: Healed enough to assess results
Week 18-20: Second session (6-8 weeks after first session heals)
Week 24-26: Final healed results
So from “I want lip tattoos” to “These are my final lips” = 6+ months minimum.
Don’t rush this. People who rush end up with whoever’s available soonest, not whoever’s best.
This works well for you if:
-
You wear lip color daily anyway
-
You have a predictable routine and can commit to aftercare
-
You’re not planning pregnancy soon (hormones can affect results)
-
You don’t have upcoming major life changes
-
You can afford maintenance long-term
-
You’re patient with healing processes
This is probably wrong for you if:
-
You rarely wear makeup
-
You change your style frequently
-
You’re impulsive and might regret it
-
You can’t afford ongoing touch-ups
-
You have keloid scarring tendency
-
You’re on blood thinners or have autoimmune issues
-
You’re getting it because someone else wants you to
Winter is ideal because you’re not sweating, not swimming, not getting as much sun exposure. Summer is the worst possible time unless you’re willing to become a hermit for a month. Spring/fall are okay if you’re disciplined about sun protection.
Also don’t book this the week before vacation, the holidays when you’ll be photographed constantly, or during wedding season if you’re in any weddings.
Real talk about expectations and mental health:
If you’re getting this to fix deep insecurity about your appearance, a lip tattoo won’t fix that. If you have body dysmorphia, this might make it worse because you’ll fixate on every imperfection in the work.
If you’re going through a major life transition (divorce, job loss, identity crisis) and thinking this will help, maybe wait. Make permanent decisions when you’re in a stable place.
Reputable artists will refuse clients who seem to have unrealistic expectations or psychological red flags. That’s not them being mean, that’s them protecting you from yourself.
If you hate it, your options suck. Laser removal on lips is painful, expensive ($200-500 per session, need multiple), and doesn’t always work completely. Sometimes you’re stuck with ghost pigment. This is why starting subtle matters.
How colors fade (what you ‘ll actually see):
Reds fade to pink, then peachy-pink, then nude-ish
Pinks fade to lighter pink, then very light pink, then barely there
Browns fade to lighter brown, then taupe, then grayish (sometimes)
Burgundy fades to berry, then mauve, then soft pink
Coral fades to pink-coral, then pink, then nude-pink
Purple fades to lighter purple, then grayish-purple (if not maintained)
The fade isn’t uniform. You’ll notice it more in the center of your lips first, then edges. It’ll look patchy during the fade process, which is why touch-ups exist to even it out and refresh color before it gets too light.
Age matters:
20s-30s: You’ll probably want enhancement/color. Your lips still have good definition. Focus on what you like aesthetically.
40s-50s: You’re likely dealing with fading lip borders, feathering, loss of definition. Corrective work makes more sense than bold color. Focus on redefining what’s been lost.
60s+: Definitely focus on border definition and corrective work. Bold colors can look harsh on mature skin. Subtle, natural tones work better. Also, healing takes longer, add 2-3 weeks to standard timeline.
Under 25: Your face is still changing. What looks good now might not suit your face in 5 years. Maybe wait unless it’s corrective work for scarring.
Check out r/PermanentMakeup on Reddit for unfiltered before/afters and people sharing their regrets. Instagram shows you the best results. Reddit shows you everything.
Facebook groups for permanent cosmetics are full of people asking “Is this normal?” two weeks post-procedure when their lips are peeling. Spoiler: yes, it’s normal, but nobody tells you how gross it looks.
Let’s be real: some workplaces will judge you for this. Finance, law, corporate environments, bold lip tattoos might limit your advancement. Is that fair? No. Is it reality? Yeah.
Your mom will probably have opinions. Your partner might have opinions. Random strangers will definitely have opinions. People feel weirdly entitled to comment on women’s faces.
Think about your daily routine and whether you’re genuinely prepared to modify it for proper aftercare. Those first two weeks post-procedure require avoiding certain foods, limiting sun exposure, and following strict cleaning protocols. Skipping these steps compromises your results and wastes your investment.
Your lips are constantly visible, constantly moving, and constantly exposed to elements that degrade pigment. Success requires managing expectations, committing to maintenance, and choosing an artist whose skill level matches your design complexity.
And for the love of god, don’t go to whoever’s running a Groupon special.